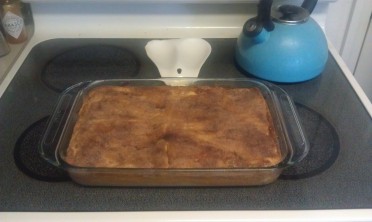
Looks like I’m back at at….

July 10, 2014

Ok, I find myself unemployed once more…what to do to make this time meaningful, stay intellectually engaged, and not get really depressed, hmmmmm?

Oh, I know!  I can go back to my old blog, and start working on projects again…

So let’s catch up.  Since my last blog post (2/2012) I have learned how to bake (the stated original goal of this blog), gotten a good job which I quickly parlayed into a better job, and then proceeded to lose within two years due to a combination of procrastination, avoidance, hubris, and just being plain busy (dumb)….I am hopeful that this will be a short stint in unemployment while I get my license details worked out…but in the meantime, here are my current projects:

the garden: lots of squash, tomatoes, a floundering green chile plant, and a bunch of flowers…all of which need watering, weeding, and picking/pruning…

the orchard: two apricot trees which are in full fruit mode right now (I know the title of orchard is a major stretch, but I got to sound smart, right?)…I have picked one tree completely and the other a bit…but the apricots are falling (read rotting on my porch) and John is getting irritated, so I had better get on this…

canning: since I have a ton of fruit, this one should make sense…although at a mile high I find canning to be a longer and hotter process than I had realized or anticipated…

cooking: with the aforementioned veggies, I need to find ways to use them all, and feed my family…thus researching and cooking, also menu planning and trying new recipes because…well I CAN!

baking: I still like to bake, and will regularly be revisiting these activities in order to stay busy…

cleaning: this should go without saying, but I am going to document it here so that I can track my activities…so laundry, cleaning the kitchen, bathroom, sweeping and mopping…

decorating: I am a little embarrassed by this one, but since we moved in November of last year, I still have not hung the art and finalized the decorating…possibly this is because I have been hoping the guys will paint…but I know this is futile…

reading:  I am reading for my book club, to keep up with Tay’s reading, and for my own pleasure…I am henceforth renewing my pledge to buy no new books except for the following 1) book club books, 2) books for John or Tay…for my own pleasure I will only be reading books I already own (here is where you imagine a large bookcase teaming with unread books)…

organizing: the kitchen shelves are a mess, there are still boxes of paperwork and computer stuff in the office…this project has the potential for many long afternoons…

quilting???: I had a lark of an idea back when I was employed, that I should learn to quilt because I CAN!  So I bought a quilting book and a bunch of supplies, and they have set there….still intending/contemplating/definitely planning to learn to quilt, I think…

writing: I want to do something generative with this time, not just the mundane make-work projects to keep me busy…so re-starting this blog (duh!), and revisiting BFBJ with John, starting my misanthrope project, or another idea I have been toying with…

and last but certainly not least….

STUDYING: this is the whole point/problem with me…my tenure as unemployed will be prolonged if I don’t study for the damned test…yet here I am  talking about everything else I want to do and not even mentioning studying…

So here is the plan…I will work on each of these projects over this period, and post my progress here, both as a form of accountability and as a way to stay engaged and motivated…I will also likely rant about life, people, and my own neuroses along the way…I know, it sounds AWESOME 😉  I’ll get right on this tomorrow….

p.s. Did I mention that I am watching Jaws 3 as I type this? Well I am….maybe Jaws 4: The Revenge is on next!

Week 4: A Challenge Accepted

January 24, 2012

In the first few weeks of my project I have already made a whole lot of sweets.  Ironically, we don’t really eat a lot of desserts, so rather than throwing them away my guy has been taking the majority of what I bake to work with him.  From what I hear, his co-workers have generally been pleased by the influx of (extra) sugar into their daily routines, with the exception of one guy…K. 

How to describe K? I should start off by saying I really like him, he is a smart guy, good at his job, a wonderful and devoted father, and a serious amateur fly-fisher, all that having been said, he is also grumpy, opinionated, and very hard to please (I once burnt the toast while we were camping and have never heard the end of it), oh, and he has a culinary degree (!?!?)…and as it turns out, he also doesn’t like sweets. Who doesn’t like sweets?

So after my guy took the decadent chocolate cake to work last week K reportedly said something along the lines of, “enough with the sweets, tell her she needs to bake something salty”.  This was of course relayed to me as a challenge by my guy, who loves to challenge me to cook and bake new things…thus this week’s baking project…soft pretzels.

I would love to claim that I came up with the idea of pretzels in response to the challenge, but immediately after my guy told me about the challenge he suggested pretzels.  Apparently they sat around and thought about it, and decided they wanted giant soft pretzels, like the ones you get at the mall…

Now Martha has nothing to say about pretzels, so to the interwebs! Which of course yielded dozens of recipes, all of which require…yeast.  I have never worked with yeast and am more than a little afraid of it, but the point of my project is to learn how to bake, and working with yeast is a key skill I need to develop, so into the void I go!

I found a recipe which looked doable (I would say easy, but none of the recipes qualified as easy) and gathered my ingredients.  I knew it was going to take a while, the recipe suggested 2 hours,  so I started early…and everything was going fine until I mixed the yeast and oil in with the dry ingredients, once more I could not get the dough to come together.  The recipe indicated that if the dough was dry I should add 2 extra tbsp of water, I did and then added 6 more (!)  to get the dough to come together (altitude adjustment :)).   After this, everything else went as planned, even the baking soda bath was relatively easy.  Following the suggestions of one of the reviewers, after dipping the pretzels in the baking soda bath, I salted and then sprayed them with butter, before baking them in the oven for 9 minutes.

They looked wonderful and smelled great! I loaded them up on a tray and delivered them to my guy’s work in the early afternoon as a snack.    We ate them with deli mustard and they were great! Even K was pleased, although my guy told me they were a little too salty…you can’t please everyone…although I have to say that I am pleased with my first use of yeast…maybe I’ll make bread next ;)…

p.s. This may be the only post this week, as I am going fishing this weekend with the guys…maybe I’ll make another batch of pretzels for the trip…

p.p.s. After making the pretzels I agree that salty was a nice break from the sweets, so I now plan to start incorporating salty and savory baked goods into my repertoire…so any recipe suggestions are always welcome…

p.p.p.s. Here is the link to the recipe: http://allrecipes.com/recipe/buttery-soft-pretzels/

Week 3: Not Your Ordinary Chocolate Chip Cookies

January 23, 2012

As I mentioned last post, Tay wanted to make chocolate chip cookies (CCC) for her sleepover Saturday night.  Now in full disclosure, I have been making batches of CCC for several months before starting this blog, and although I seem to have generally satisfied customers, I have never been truly happy with the outcome…usually they are too cake-like and just don’t look like what I want my CCC to look like (I have been accused of being a perfectionist :)).  Yes, consistency is an ongoing concern of mine, and in trying to improve my cookies I had consulted various websites and local bakers, all with different advice for managing altitude such as cutting back on flour, increasing water, or decreasing eggs…which ultimately just served to overwhelm me…

So when Tay wanted to make CCC, I felt a little anxious at first, but then recalled a recent recipe that I had run across that was egg-free and accompanied by an amazing picture (because if I’m being honest, how they look is really important to me), so I figured this was a good time to try it out.

The recipe was designed for people with food allergies, and replaces the eggs with cream cheese (!)….now this is a win-win scenario for me…no, we are not dealing with food allergies, but eggs are one of the volatile ingredients when baking at high altitude, so a recipe with no eggs might be easier to bake, plus the added bonus of cream cheese! I know, say it with me…chocolate chip cream cheese cookies!!  My guy is a big fan of cream cheese, as it is a featured ingredient in several of our favorite recipes including my mashed potatoes (thank you Pioneer Woman), and Tay was pretty excited about them as well…thus it was determined that on Saturday we would bake CCC with cream cheese…

The recipe can be found here: http://www.melskitchencafe.com/2012/01/cream-cheese-chocolate-chip-cookies-egg-free.html 

Saturday was busy, with getting ready for the sleepover, our regular weekend chores, and some extra cleaning in anticipation of our guest (I know, I was cleaning house for a 12 year-old girl who would never notice if my kitchen floor was clean, but in the off-chance that her parents came in when they dropped her off, I wanted to be prepared)…so I was a bit worried about having time to get the cookies done.  I shouldn’t have been, we managed to get everything done in ample time and get some lazy couch time in before the sleepover started!  The recipe was super easy, mixed in minutes, and the dough was delicious (and egg-free so we could eat as much as we wanted to Tay’s delight)…my only change was rather than 1 1/2 cups of chocolate chips, I used 1/2 milk chocolate chips and 1/2 white chocolate chips, for a little diversity.  My dough was a little to sticky and would not roll into balls, so I simply dropped them by the spoonful onto the cookie sheet, and baked them for the recommended 13 minutes, yielding approximately 40 cookies.  They came out of the oven beautifully, smelled wonderful, and were so moist!  


These cookies were a big hit with everyone, eaten plain with a glass of milk, or served with some vanilla ice cream and chocolate syrup.  They tasted even better the next day and looked like exactly what I want my CCC to look like!  That night my guy jokingly declared that he was no longer going to eat anything unless it had cream cheese in it, even bacon…I can hear him now, “woman, cream cheese up that bacon!”

Say it one last time with me…chocolate chip cream cheese cookies!

p.s. My guy took the chocolate cake I made the other day to work, and came home with a challenge for me from one of his co-workers…to bake something salty, hmmmm…..

Week 3: Continuing with Cakes

January 18, 2012

Yesterday I had intended to bake bread, not a quick bread mind you, but the yeast bread (of horror) that I have been avoiding.  Well, this plan fell through because I realized that the only yeast I have in the house is pizza yeast, Fleischmann’s to be exact, and the interwebs could not conclusively answer whether I could also use this to make bread…so sadly bread was out (!). 

Once more the recipes in Martha were too involved, this time it was my mood and motivation that were lacking, so I opened one of my go-to websites and pretty much decided to bake the first cake recipe I read, which can be found here: http://allrecipes.com/recipe/black-magic-cake/Detail.aspx

What I liked about this recipe was that I had all of the ingredients, it was pretty much a “beat and bake” cake, and one of the reviewers suggested baking it in a bundt pan, which appealed to my laziness…I followed the recipe exactly, although I am not sure how strong  “strong coffee” is, so I made a regular pot of coffee.  I cooked the cake in a bundt pan and at the recommended 40 minutes my cake had only partly risen and was very gooey on the inside, so I baked it for an additional 15 minutes (altitude adjustment :)), and it looked done…cooled for 10 in the pan, and then turned it out (easy!) to cool the rest of the way.  

While it was cooling I needed to figure out what else to do with it, as my guy’s comment was, “is that it? it needs something…”  In perusing my glazing and frosting options, I stumbled across a bag of “leftover from christmas” Hersey’s kisses and decided to use them in a frosting.  I melted approximately 30 kisses with a stick of butter over medium heat…it started out as an oily mess, with the butter and chocolate not combining until I started adding heavy cream…of course this did the trick, and very quickly I had a wonderful chocolate sauce, not quite frosting or glaze, which I poured over the cake.  This time it was my guy watching as I poured, and similar to my adventure with Tay the other day, it was him licking the chocolate up as it poured over the cake and onto the counter, like father like daughter 🙂

After dinner we each had a small slice of cake with milk (it needed something to cut the sweet), and it was chocolate heaven!  The cake was moist and rich, and my guy ate it quickly with a very satisfied look on his face….another cake success!

p.s. yeast bread will have to wait another week…Tay is having a friend sleepover this weekend, and requested that we make chocolate chip cookies on Saturday…who am I to refuse such a request? 

Week 2: Winter Citrus Baking Pt. 2 or Tay and I Bake a Crazy (and complicated) Chocolate-Orange Cake!

January 15, 2012

This weekend I made a decision…when Tay and I bake on Saturdays I will let her pick the recipe, with a few stipulations, 1) the ingredients have to be readily available or easily obtained (this means nothing that calls for pistachio paste!), and 2) the recipe can’t be too complicated.  So with this in mind, Tay and I set down with Martha yesterday and started going through recipes…unfortunately, almost every recipe failed the above criteria with out-of-season ingredients or simply to difficult for an easy Saturday afternoon of baking.  Tay was feeling discouraged, so I showed her the chocolate-orange cake recipe that I had been drooling over last week, and she immediately said “yes!”

The recipe can be found here (at what Tay calls my favorite website): http://allrecipes.com/recipe/decadent-chocolate-orange-cake/detail.aspx

Now I had read the recipe several times and knew it was involved, but was optimistic that it wasn’t going to be “difficult”.  We started at about 2 pm (I know because we were trying to get the cake in the oven by the 2:30 kickoff of the 49ers versus the Saints).  Right off I knew it was going to be a long afternoon of baking…I set Tay to cutting out the parchment paper for the cake pans while I peeled the oranges.  Both tasks proved a little more difficult than anticipated…and I should have known it would be a complicated recipe when it required a food processor, mixer, sifter, custom cut parchment paper, and layers of cake, filling, and ganache…but of course, being me, it didn’t quite click…needless to say, we got the cakes in the oven around 3pm, which means that I missed kick-off and instead had a hyper tween running between the kitchen and living room giving me updates (LOL!)

So far, getting the cakes together had been complicated, but I was optimistic that everything else would go smoothly.  The cakes cooked beautifully in 35 minutes, I let them cool for 10 in the pan, and another 30 on the racks.  So it is now about 4:15, we made the cream-cheese filling with no issues, but because I have 9 inch pans, rather than the recommended 8 inch pans, we decided that cutting the cakes in half was not going to work, and settled on a two-layer cake instead of a four-layer cake.  The next step involved making layers as follows: cake – cream cheese filling –  chocolate ganache – cake – chocolate ganache…needless to say, we were excited!  The first layer went fine and looked amazing, but I neglected the recommendation that the ganache should cool slightly before adding the next layer…I know you can see where this is going…anyways, I immediately added the next layer of cake and topped it with the rest of the ganache, which poured beautifully onto the cake and over the edges of the pan, all over the counter, Tay, and myself! Yes, we had too much ganache because we only made two layers rather than the recommended four.  Despite being a major mess it was also very funny…picture a cute 11 year-old licking chocolate off her fingers and trying to wipe it off the counter, yes, she had chocolate all over her face! 

Anyways the cake was basically done, but as I put it in the fridge to firm up the layers it started sliding (!), resulting in a slightly off-balance two-layer cake… The kitchen was a mess, but as I have told Tay numerous times, a mess didn’t happen if nobody witnesses it (of course the “nobody” in this equation is her father :)), so we cleaned the kitchen and sat down to watch the end of the football game as the ganache firmed.  At 6pm, right before my guy was due home from work, we pulled the cake out and added the final touch…mandarin oranges in a flower pattern!

We waited until after dinner to eat the cake (aren’t we responsible adults), and I have never seen a child more excited about cake…she kept talking about it all evening.  When the three of us finally sat down to try the cake, my guy gave us the highest praise and said that the cake looks like something you would see in a pastry or coffee shop!  We all loved it, each layer tasted amazing and when eaten together was the perfect balance of orange, chocolate and sweet…this was a big win for us…go team!

p.s. The 49ers won and the Broncos didn’t!! It was a good day at our house…

Week 2: Winter Citrus Baking

January 13, 2012

If you will recall, last weekend I got distracted one morning by researching seasonal fruits and vegetables.  I was researching seasonal fruits because while reading through “Martha Stewart’s Baking Handbook”, I kept returning to a recipe for a rhubarb crisp which looks amazing…so I wanted to know when rhubarb is in season.  I learned several new things, 1) rhubarb is not a fruit (!) it is a vegetable, 2) it is not in season until April, and 3) the only fruits currently in season are citrus fruits. 

Martha didn’t have any citrus recipes that spoke to me, so I turned to my trusty friend, the internet, which has never failed me.  Of course a search for “winter citrus baking” yielded numerous sites advertising classes on citrus baking but no actual recipes…At this point  it was clear a more targeted search was going to be required, but I decided before focusing my search I should maybe see what ingredients I had in my fridge (common sense, I know!).  As it turns out I had recently bought several oranges at the store because I was so happy they were back in season (duh), but hadn’t done anything with them yet…oranges it is…

An internet search of “orange baking recipes” yielded a bunch of cake and bread options, but since I had recently made cranberry-orange bread, I decided that it was time for a cake.  The cake recipes ranged from simple to complicated, but again the availability of ingredients won out (i.e. I don’t have orange extract or marmalade readily available), so I settled on a recipe titled “beat and bake orange cake”.  Let’s be clear, I hate the title and am pretty sure there is a joke in there somewhere, but the recipe looked easy and good…it can be found here: http://allrecipes.com/recipe/beat-and-bake-orange-cake/

I read the recipe reviews before starting and opted to make two round cakes with the orange frosting.  I also decided that I needed to add some extra ingredients to make sure it was moist and citrusy (is that a word?).  I followed the recipe closely and it lived up to its simple name.  My only deviations from the recipe were that I added 1/4 cup of sour cream to the batter, extra orange zest (1 tsp) to the batter and frosting, an extra tbsp of orange juice to the frosting, and only 1 1/2 cups of powdered sugar rather than the recommended two cups.  I baked the cakes for the recommended time, and let them cool for an hour before frosting them.

After dinner last night we both tried the cake and it was good! Moist and orangey, without being too sweet or overwhelming…and worthy of going to work with my guy the next morning.  We will see what the guys at his work think…

Well, there it is, this week’s entry and my first documented attempt at seasonal baking…on to the next one…

p.s. While researching this recipe I came across an insane looking orange-chocolate ganache four-layer cake which I am seriously considering attempting soon, I’ll let you know…

Week 1: What the…I don’t even…I accidentally the whole thing.

January 8, 2012

Saturday afternoon, and in addition to our daily chores (laundry, vacuuming, cleaning the bathrooms, ugh) and going to the store, Tay and I planned to bake a dessert for fun and for the poker game we were hosting that night.  I had come across this recipe while searching the interwebs and was intrigued by the name “sopapilla pumpkin cheesecake bars”.  I have been baking a lot with pumpkin over the last several months and had all the ingredients…besides who doesn’t love pumpkin cheesecake? 

The recipe comes from Willow Bird Baking, at the following website: http://willowbirdbaking.com/2011/10/02/easy-sopapilla-pumpkin-cheesecake-bars/

The recipe was very easy to execute, and Tay and I fully experienced the joy that is using a stand mixer when we combined the sugar and cream cheese.  Even getting the crescent roll dough into the pan was painless.  The entire dish was put together in a very short time with almost no mess, and that is a major accomplishment for us!  After cooking for the indicated amount of time, I let them cool, and then chilled in the refrigerator for three hours before serving them.  I didn’t do the nuts and honey thing because it would have been too complicated with a poker game going on…so I cut them into small pieces and served them cold.

These were a big hit with my guests, who ate almost half the pan over the course of the night. In close, these were easy and tasty, and the mixer is a must have!  My only comment is a personal one, living in New Mexico I feel a little chagrined that I made a recipe that claims to have sopapillas in them but doesn’t…I think I may have to learn to make real sopapillas…The title for this blog comes from the text I received from my guy after sending him the following picture..

p.s. In case you were wondering, I won poker!  It was a small game, I took out the first player, my guy took out the next two, and it came down to he and I…and I won 🙂

p.p.s. These bars go great with rum…

Week 1: Buttermilk Biscuits for Breakfast

January 7, 2012

Its Friday night and I’m thinking about breakfast for tomorrow morning (yes, I live an exciting life these days :)…I had recently made breakfast for dinner and my guy complained about the store-bought biscuits, jokingly making the ultimatum “no more store biscuits, I want homemade biscuits from now on!”

So I turned to my new cookbook, “Martha Stewart’s Baking Handbook”, and perused her biscuit recipes.  I had all of the ingredients for her buttermilk biscuits (page 32) and decided these were the ones.  Here is where I also admit shamefully that this Southern girl has never made homemade biscuits and is a bit intimidated by the idea 😦

I woke up early this morning (7:30!) with the plan of having breakfast ready by 9:30 (my guy had to be at work by 11am). Of course I was slow to get started, got distracted researching seasonal fruits and winter citrus baking recipes (more on this later in the week), and didn’t even get started until 9.  Now the recipes in Martha’s book are clear and detailed, but I was starting at a disadvantage because I don’t own a pastry blender, biscuit cutter or silicone spatula…instead I planned to use a fork to cut the butter, a large cooking spoon as a spatula, and a regular drinking glass as my biscuit cutter. It took me at least 20 minutes to cut the butter into the flour mix with my fork, and then when mixing the buttermilk into the flour I again could NOT get my dough to come together!  It was a crumbly mess, so I broke down and added more buttermilk, 3 extra tablespoons…those of you who read about my adventure making scones will recall that this is a familiar problem for me…Anyways all else went smoothly and the drinking glass worked fine as a biscuit cutter.  I cooked the biscuits for 19 minutes, and even rotated the baking sheet halfway through!

The end result was 10 lovely looking buttermilk biscuits, which I served with butter, jam, bacon and scrambled eggs with cheese.  My guy said they were much better than the store-bought ones and Tay (his 11 year-old daughter and burgeoning food critic) told me they were very good! Even I thought they were good…I have to say I am pleased with my first attempt at biscuits, and feeling more Southern by the moment!

p.s. This afternoon while doing the weekly shopping at Wal-Mart, I bought a pastry blender ($3.29) and a silicone spatula ($2.99).

Week 1: The Scones of Contention

January 4, 2012

So starts my new project, learning how to bake…and as my new baking cookbook was still in the mail, I turned to the internet for a recipe to kick things off.  I found this wonderful recipe on one of my favorite cooking blogs and thought, “I’ll make those! They look easy enough”.  Famous last words…

Before we get to the recipe, I should share some pertinent facts about myself and my situation.  I live in Albuquerque, NM which is considered a “high altitude” baking environment…this doesn’t mean much to me though, because I have NEVER baked at any other altitude that I have lived (e.g. sea level on the east coast, in the midwest), so I have no basis for comparison.  I have very basic kitchen equipment, that means a cheap mixer I bought off of Craigslist (red Farberware), a food processor that is on loan (pink Ninja), and an aging assortment of pots, pans, bowls, and utensils that don’t match.  I also have no past baking experience (seriously I made my first cake six months ago!), due to a combination of disinterest , fear, and growing up in a home where my mom made holiday treats that were simple and required limited baking.  Thus I begin my “currently (temporarily) unemployed and so will learn to bake project”.

The recipe is for pumpkin scones with a ginger glaze and can be found at the following address: http://www.melskitchencafe.com/2011/12/pumpkin-scones-with-ginger-glaze.html

I followed the recipe fairly faithfully with a few exceptions:

I added 3 EXTRA tablespoons of buttermilk to the dough to make it stick together

I added an extra splash of milk to the glaze in order to make it a liquid glaze

A few notes, I had a hard time cutting the butter in, and although the recipe clearly describes the desired outcome, I kept second guessing whether I had achieved “coarse crumbles”.  I added the extra buttermilk because I could not get the dough to come together, but in retrospect, I am not sure what “come together” really means.  For the glaze, I had to add the extra milk because at the recommended amounts my milk/ powdered sugar/ vanilla combination was more cement and less glaze.  I also had to bake them for 21 minutes rather than the recommended 18-20, possibly due to the altitude?  I also doubled the recipe to get 16 scones for samples and feedback. Other than these few things, they looked wonderful, smelled great, and I deemed them worthy of sending to work with my guy the next day and taking to rounds at the hospital.  Although I didn’t taste them…

Here is where things get contentious, as I solicited feedback from my guy and his coworkers I was told that they were “very, very sweet…you’ve made me diabetic”, that “the glaze is fine, but the dough is more bread-like than scones”, and that I should “think like the southern girl I am, and aim for biscuit-like consistency”.  At rounds my colleagues expressed confusion over the sweetness comment, explaining that the sweetness was “just right” and describing the scones as “very moist”. 

So what do I take from this first round of scones…I really messed up the dough, and rather than scones I actually made scone-shaped muffins.  Don’t get me wrong, they tasted great, when I finally ate one, but the texture and consistency did not resemble a scone.  Why do I think this happened?  I am guessing that the extra buttermilk   I added was the problem…I really need to figure out how to judge when dough is coming together.

In close, even if this wasn’t an entirely successful attempt at scones, I learned about cutting butter and the dangers of too much buttermilk.  On to the next one…

p.s. I got my new baking cookbook in the mail today, so in the future I will be quoting Martha Stewart and working my way through her “Baking Handbook”.

Today is the Day!

January 3, 2012

Well, today is the day I begin my little project. 

Here’s how it is supposed to work…I plan to bake at least one new recipe each week, which I will document on this blog.  The recipes will span the gamut from basic breads to complex desserts, which I will draw from a variety of sources, including cookbooks, friend’s recipes, and the internet.

The goal is to truly learn to bake, and all that that entails.  I anticipate that the outcome will not always be pretty or even taste good…but that is the whole point right?  To figure it out as I go…